Kombucha, a tangy and effervescent fermented tea, has grown immensely popular due to its purported health benefits and unique taste. Making kombucha at home is a rewarding process that allows you to customize flavors and ensure the quality of your brew. The key ingredients for home-brewing kombucha are a SCOBY (Symbiotic Culture of Bacteria and Yeast) and starter tea. This article will guide you through the entire process, from gathering materials to bottling your homemade kombucha.
🧾What You Will Need
Before diving into the brewing process, it’s crucial to gather all necessary materials. Measurements below are for making 2 litre Kombucha.
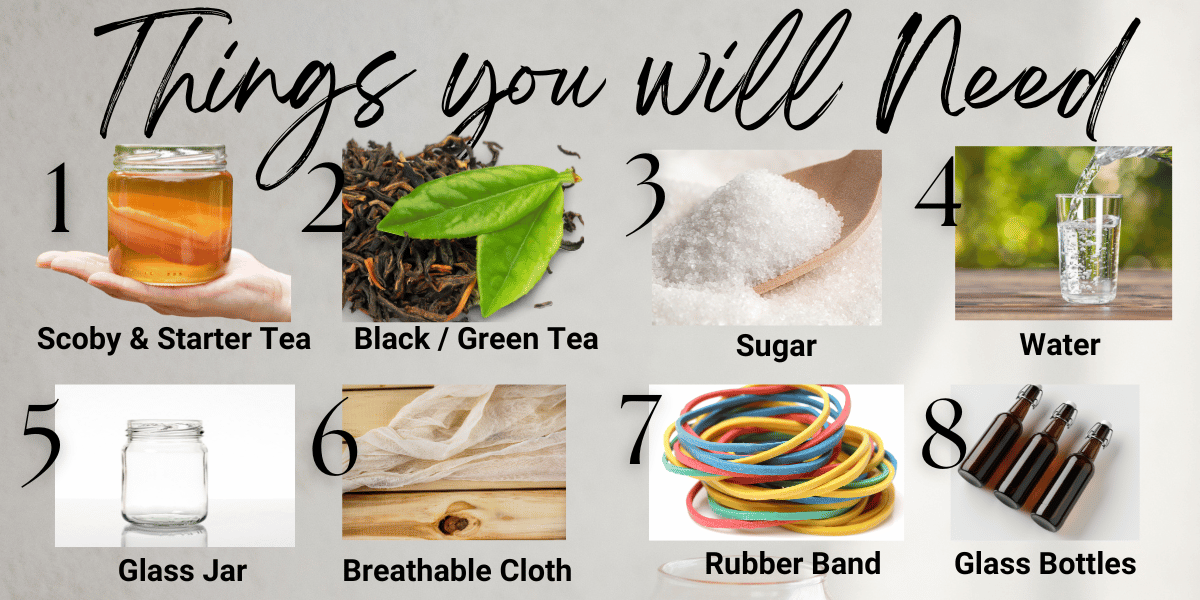
- SCOBY: This is the living culture that will ferment your tea. You can purchase a SCOBY online or obtain one from a friend who brews kombucha.
- Starter Tea: This is already fermented kombucha tea, typically from a previous batch. If you buy a SCOBY, it usually comes with some starter tea. 200 ml of starter tea would be enough for making 2 litre Kombucha.(approx 1:9 starter tea:black tea)
- Black or Green Tea: Traditional kombucha is made with black or green tea. Avoid flavored teas with oils, as these can harm the SCOBY. Approx 12 gram tea (6 tea bags) would be enough.
- Sugar: 120 grams. Regular white granulated sugar works best. Do not use honey or artificial sweeteners.
- Water: Filtered or distilled water is ideal to avoid chlorine and other chemicals.
- A Large Glass Jar: A 3 litre - 4 litre jar would be a good choice for beginners.
- Breathable Cloth: Use a coffee filter, paper towel, or cheesecloth to cover the jar.
- Rubber Band: To secure the cloth over the jar.
- Bottles: For storing the finished kombucha. Glass bottles with airtight lids are best for secondary fermentation.

Step-by-Step Brewing Process
1. Prepare the Sweet Tea
Begin by boiling about 2 litres of water. Once boiling, remove from heat and 12 grams of black or green tea. Let the tea steep for 10-15 minutes, then remove the tea bags. Stir in 120 grams of granulated sugar until completely dissolved. Allow the sweetened tea to cool to room temperature.
2. Combine Tea with SCOBY and Starter Tea
Pour 1800 ml cooled black tea into your large glass jar. Add 200 ml starter tea to the jar. This starter tea lowers the pH of the mixture, which helps prevent harmful bacteria from taking hold. Gently place the SCOBY into the tea mixture. It may float, sink, or sit sideways — all are normal.
3. Ferment the Tea
Cover the jar with a breathable cloth and secure it with a rubber band to keep out insects and debris. Place the jar in a warm, dark place, ideally between 20-30°C. Allow the tea to ferment for 6-14 days. The duration depends on your taste preference and outside temperate; longer fermentation results in a tangier kombucha.
4. Taste Testing
After about six days, begin tasting the kombucha daily using a clean straw or spoon. Insert the straw underneath the SCOBY, cap the top, and draw out a small sample. When the kombucha reaches your preferred balance of sweetness and tartness, it is ready for the next step.
5. Remove SCOBY and Reserve Starter Tea
With clean hands, remove the SCOBY and place it on a clean plate. Pour off 200 ml(or 10% volume of the next batch you are going to make) of the fermented kombucha to use as starter tea for your next batch. This ensures the continued growth and health of your SCOBY.
6. Bottle the Kombucha
Using a funnel, pour the fermented kombucha into glass bottles, leaving about an inch of headspace at the top. You can add flavorings such as fruit, ginger, or herbs at this stage if desired(10% -15% by volume of stage 1 kombucha, if you wish to do the secondary fermentation). Tightly seal the bottles with their lids.
7. Secondary Fermentation (Optional)
For a fizzy kombucha, you can let the filled bottles sit at room temperature for 2-4 days to carbonate. During this time, the kombucha will develop natural effervescence. Check the bottles daily and burp them (open the lid briefly) to release pressure and prevent explosions.
8. Refrigerate and Enjoy
After the secondary fermentation, refrigerate the bottles to slow down the fermentation process and enjoy your homemade kombucha. Serve chilled over ice or straight from the bottle.
🔧Troubleshooting Tips
Mold: If you see fuzzy blue, green, or black spots on your SCOBY, discard the entire batch and start over. Mold is a sign of contamination.
Off Flavors: Metallic or overly yeasty flavors can result from using non-glass containers or improper hygiene. Ensure all equipment is thoroughly cleaned before use.
Flat Kombucha: Ensure bottles are airtight during secondary fermentation and that the environment is warm enough for carbonation to occur.
Brewing kombucha at home is a delightful and educational experience that allows you to experiment with flavors and refine your technique. With a SCOBY and some starter tea, you can craft a delicious and healthy beverage that’s tailored to your taste. Remember to maintain a clean environment and monitor your brew closely. Happy fermenting!

